Many years ago on a former blog I had a tutorial on how to do a reduction linocut. A reduction linocut, said to have been invented by Pablo Picasso as a means to economizing on linoleum, is when you use only one block to make a color print instead of the traditional one block per color method. The word ‘reduction’ refers to the continued carving away of the block, resulting in a block that is destroyed at the end of the process and, therefore, a truly limited edition of prints. When I was at the Hill School last week, I came across this demo piece I made several years ago and photographed it so I could repeat a tutorial on this blog.
Below is a piece of art linoleum. It is readily available from art stores. Though I do not know where I got this particular piece from, I can say that now I buy all my relief printing supplies from McClain’s
Transfer your design onto the block or draw directly on the block. Keep in mind, the final print will be in reverse of the image of your block.
Below I am showing the first cuts I made, then the block was inked and printed in yellow. The white part showing (which is the paper) is the part that was cut away from the block and the yellow part is what was left. In relief printing, it is what is left on the block (or the raised part) that will print.

Next I will cut away any part that I want to remain yellow and the next color I will print is green. The green inked block is ‘registered’, or lined up with, what was previously printed in yellow and printed on top. So basically, I printed the green inked block on top of the yellow print. I also printed a sample of the block in just green and you can see that more of the paper underneath is exposed in this version and gives an idea of how much was cut away.

I am now going to print the last color, which is black. So I carve away all the parts I want to remain green, ink up the block with black ink, and print the black in on top of the yellow/green image. Here is the result.
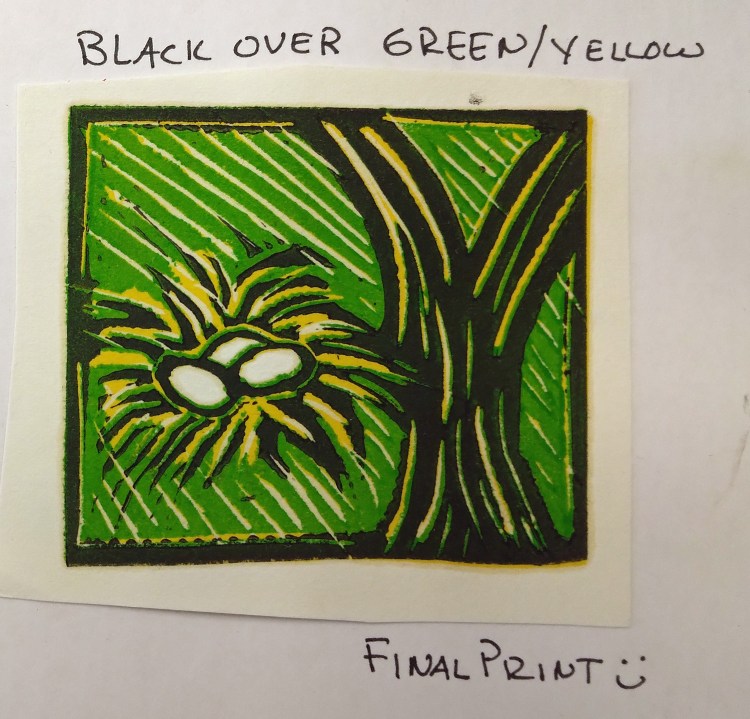
And I will also show you what the block looks like just printed in black as well as what is left of the actual linoleum block itself.


Below you will see the whole tutorial that I mounted on a board so it could be displayed during class as a reminder of the steps involved.

So if you want an edition of prints, say 10 in total, it is always a good idea to start with more until you get very good at registering your prints on top of one another. This way, if you misregister and have to discard some prints, you will still have a decent size edition. For as long as I have been printing, I still from time to time misregister prints. It happens. What I love about reduction printing is that it is like solving a logic puzzle. I think it is sort of related to why I like to key plants.
I have used a lot of terms in this tutorial such as registration, drawing transfer, and editioning. But for this post, I wanted to stick with just explaining the basics of reduction block printing. If you have printed before then those terms are probably familiar to you. Actually, here is a post of some basics on block printing. Any questions, feel free to send a comment or contact me.

I’ve only done this a few times. You are so skillful at it. And your explanation is so clear.
LikeLiked by 1 person
Thanks Claudia. Though I think my skill to register a print has diminished since I don’t do too many of these anymore
LikeLiked by 1 person